Getting Started
- How Plumsail HelpDesk works
- HelpDesk installation
- Quick HelpDesk configuration
- Frequently asked questions
- Resources
Configuration guide
- Email settings
- Triggers
- Web widget
- Tab for Microsoft Teams
- Customize widget forms
- Customize ticket and contact forms
- Customer satisfaction survey (CSAT)
- Scheduling of tasks and reminders
- Business hours and holidays
- SLA policy
- Localization
- Appearance settings
- Color theme
- Customize ticket statuses
- Reports customization
- Ticket numbering customization
- Update HelpDesk
- Uninstall HelpDesk
User guide
- Home page
- Ticket management
- Ticket search
- Knowledge base
- All tickets
- Contacts
- My contact
- Reports
- Canned responses
- Ticket merging
- Ticket splitting
- SLA policies
General
- Version history
- Data protection and security
- Data center location
- Licensing details
- Billing and subscription management
- Support plans
- Status page
Power Automate (Microsoft Flow) and Public API
How to
Installation of HelpDesk SharePoint Framework package
Note
You must be a SharePoint administrator to complete this installation.
If you do not see some of the menus described below, you likely do not have the required permissions. Contact your SharePoint administrator for assistance.
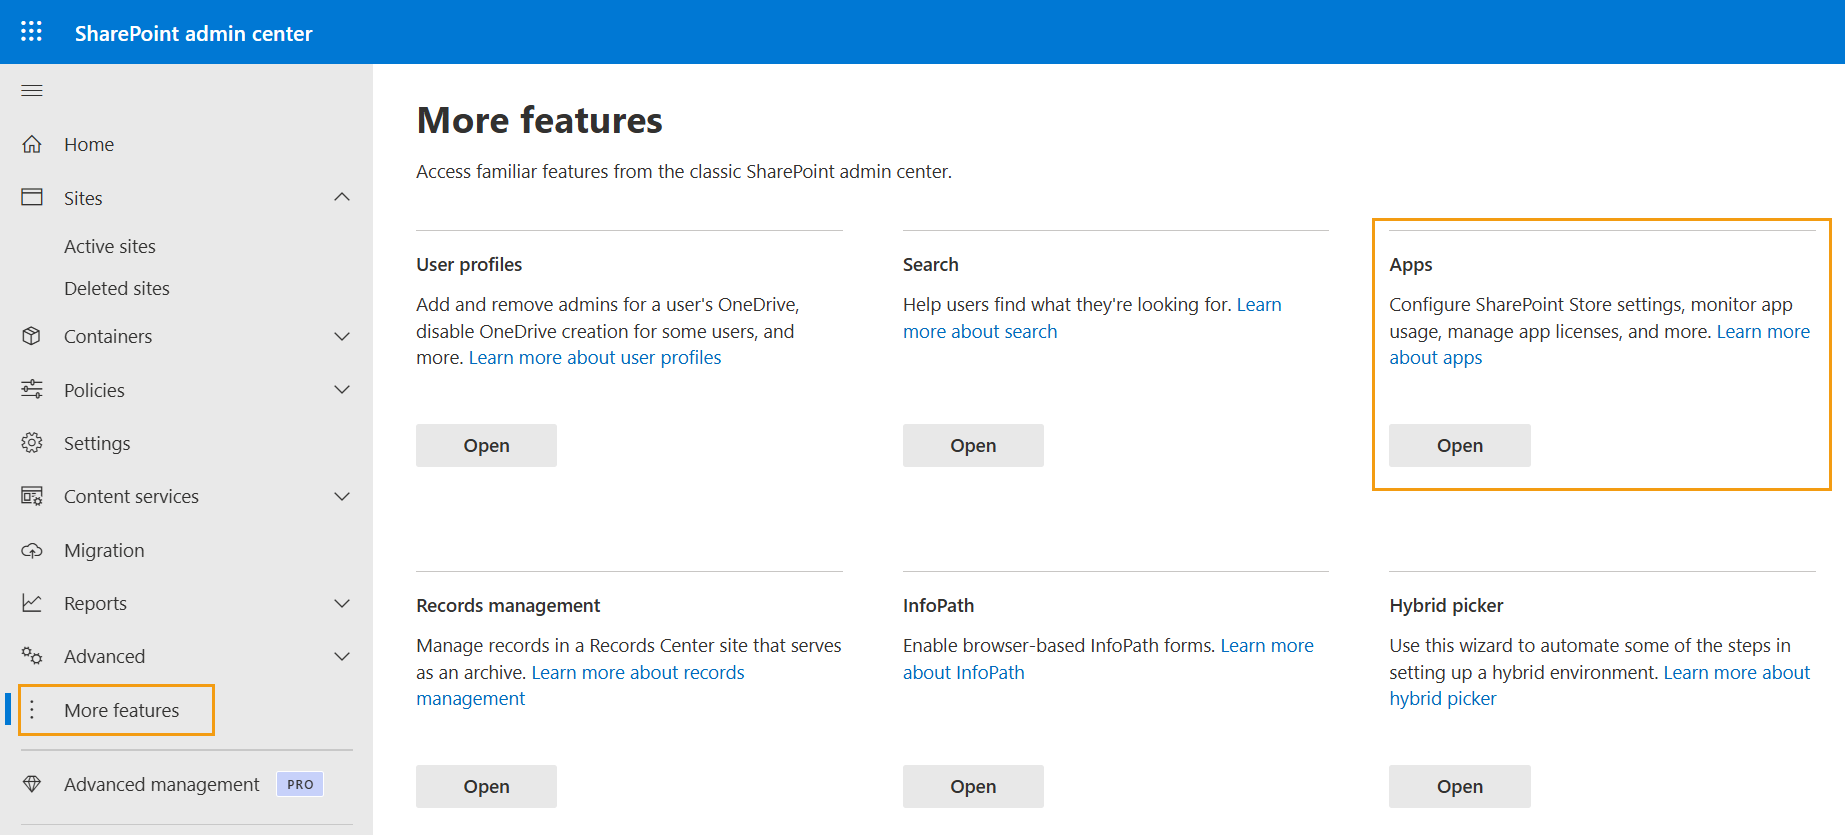
Open the SharePoint Admin Center.
Go to More features > Apps.

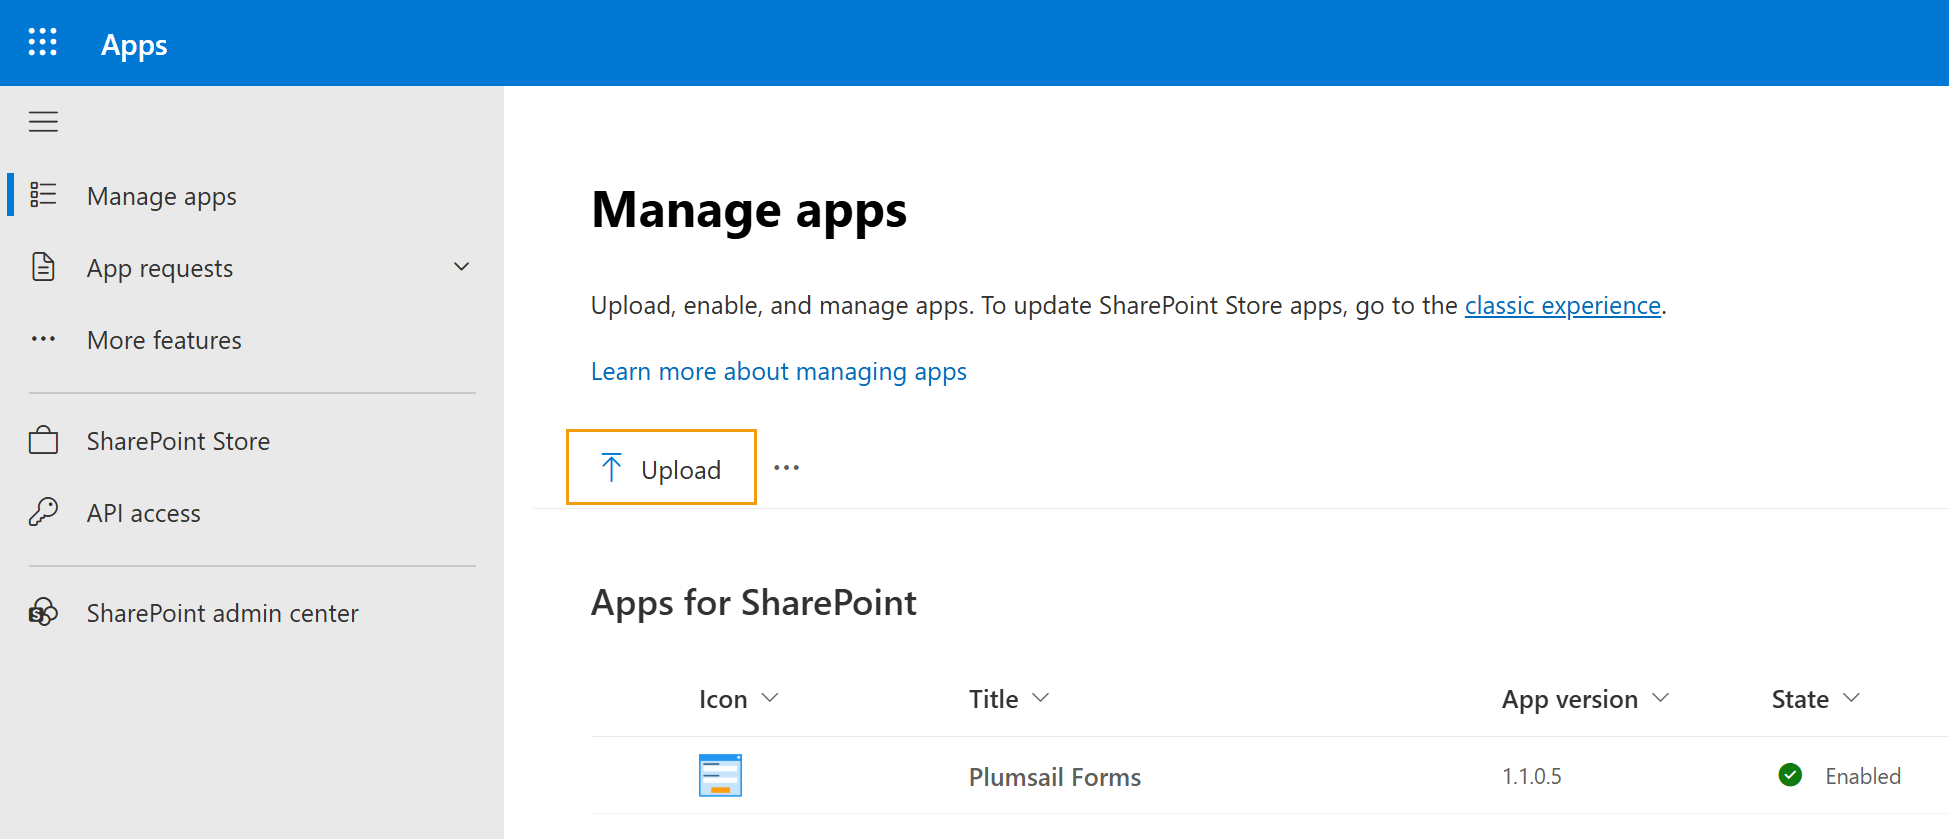
4. If a HelpDesk package is already installed, remove the existing package first.
Then upload the .sppkg file downloaded as-is and do not extract or modify its contents before uploading.

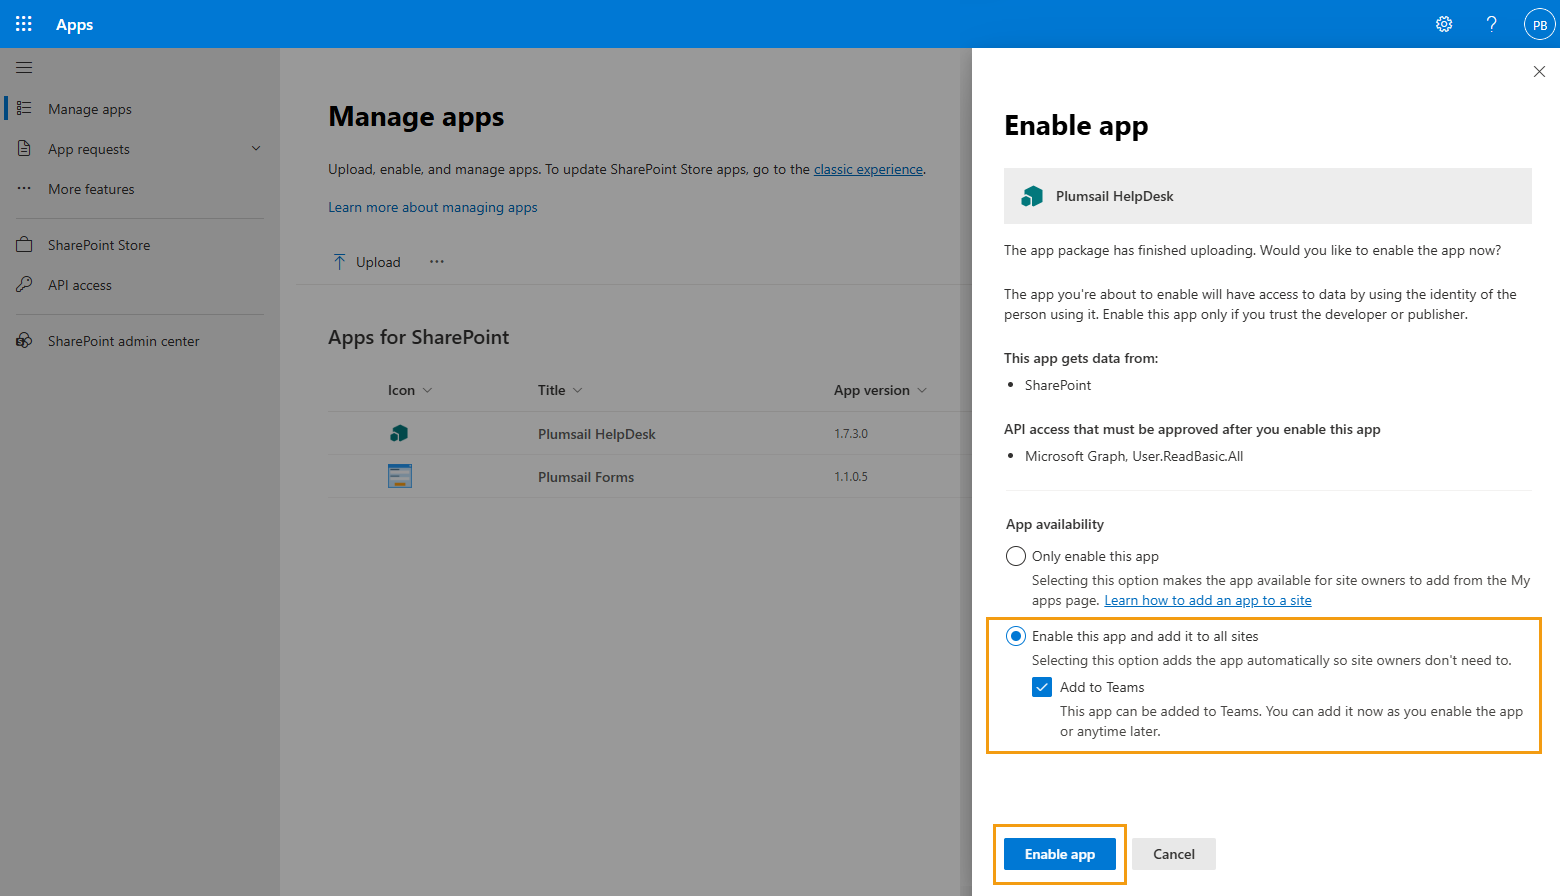
5. In the confirmation dialog, select Enable this app and add it to all sites, then click Enable app. If you also plan to add the HelpDesk widget to Teams, leave Add to Teams enabled.

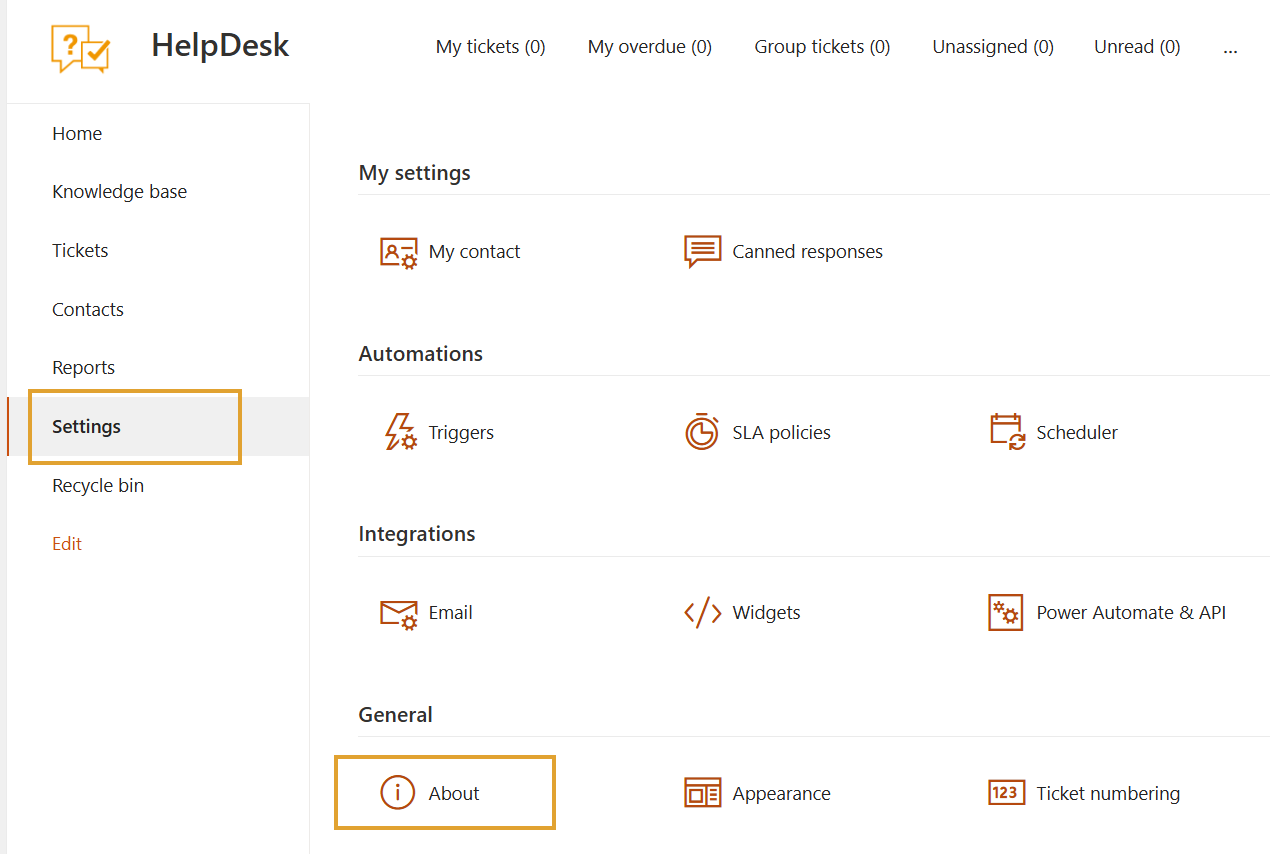
You can always verify the installed HelpDesk version on the About page in the HelpDesk settings.

Note
The version displayed in the SharePoint App Catalog may differ from the actual HelpDesk version since the package uses a different versioning convention.