Read CSV file in Power Automate and bulk generate documents
This article demonstrates how to read CSV files in Power Automate (Microsoft Flow) using Parse CSV action from Plumsail Actions connector. We will use results from this action to bulk generate documents.
Let’s say a company has a CSV file with customers. They want to bulk generate invitations to a conference for all the customers and then print them and send using postal service.
In this example, we will read a CSV file and use the available headers to fill up the invitations. The invitation will be a result file of Create DOCX document from template action from the Plumsail Documents connector. To fill up the DOCX template we’re going to use Parse CSV output items.
Our source CSV file has to be stored somewhere. Power Automate (Microsoft Flow) has a lot of connectors for different systems.
Here are just a few of them:
SharePoint
Salesforce
Box
OneDrive
Google Drive
Dropbox
SFTP
File System
You can store your files anywhere. In this example, we will store our source PDF file in OneDrive folder, but you can get data from any other sources. These are links to download the demo files
This is how our flow looks:

Below is a step by step description of the flow.
Parsing a CSV file
Flow trigger
You can actually pick any trigger. For example, you can start Flow on file creation in a SharePoint document library. We use Manually trigger a flow trigger here to simplify the Flow.
Get file content
This action gets file content of the specified file from a OneDrive folder. Just specify the path to your file. We use this action to read our sample CSV file and the source DOCX template.
You can use any other connector to get files from your system.
Parsing CSV
This is an action from Plumsail Actions connector.
Adding the Plumsail action for the first time, you’ll be asked for a Connection name, API Key, and Data center location.
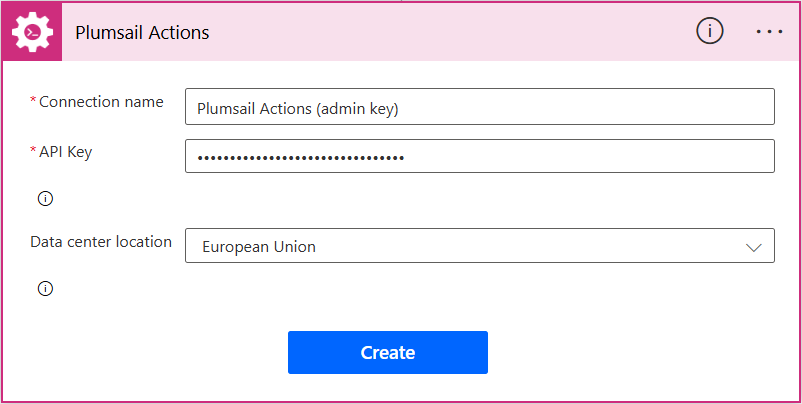
You can type any name for the connection, for example Plumsail Actions (admin key). Next create an API key on your Plumsail account page, copy, and paste it to the API Key field. Ensure that the selected data center location matches one of your account.
Put CSV file content from the output of the previous action. In the Headers field, specify the CSV file headers, then you’ll be able to select the headers in the dynamic content window. In our example, we’re going to use the customer first name, last name and the company name. You can find more detailed information about Parse CSV action here.


On the next steps we use the action Create DOCX document from template. This is an action from Plumsail Documents connector. Template Data is an object, that will be applied to our DOCX template and in our case, we apply just two columns from our CSV to the template, “FirstName” and “LastName”. You can read more about creating documents from templates here. After creating a DOCX invitation we convert it to PDF using company name item and save it to the OneDrive folder.

You can find more detailed information about Parse CSV action here.
Conclusion
That is all, the flow is configured. These few simple steps can help to ease the work with documents.
Note
Plumsail Documents connector also has similar action. You can find description here .