How to populate dropdown column of DataTable in SharePoint form with data from any SharePoint list
In this article, we’ll show you how to load values from SharePoint List and display them in DataTable control dropdowns.
Essentially, this works similar to Lookup fields, but the values are stored as text, and if something changes in the source lists, the values in DataTable will stay the same.
This functionality also supports filtering and cascading selection, which we’ll showcase in the article.
Source Lists
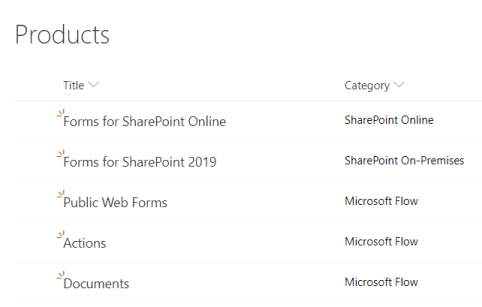
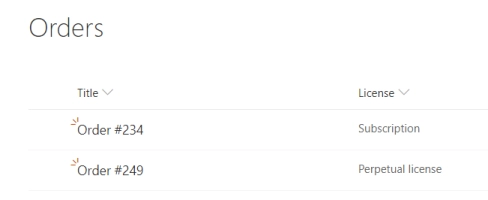
First, create three SharePoint Lists - Categories, Products and Orders.
Categories List will contain two columns - Title and License (Choice):

Products List will contain two columns as well - Title and Category (Lookup):
Finally, Orders will also contain two columns - Title and License (Choice):
Form Configuration
Open Orders List in editor and customize forms, add Title and License.
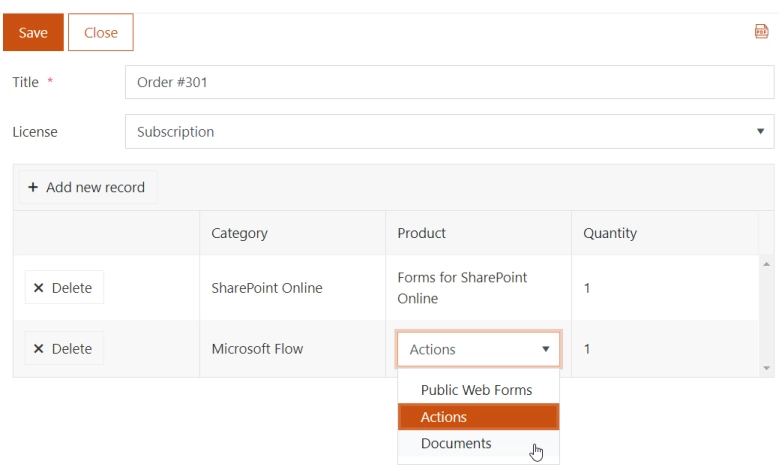
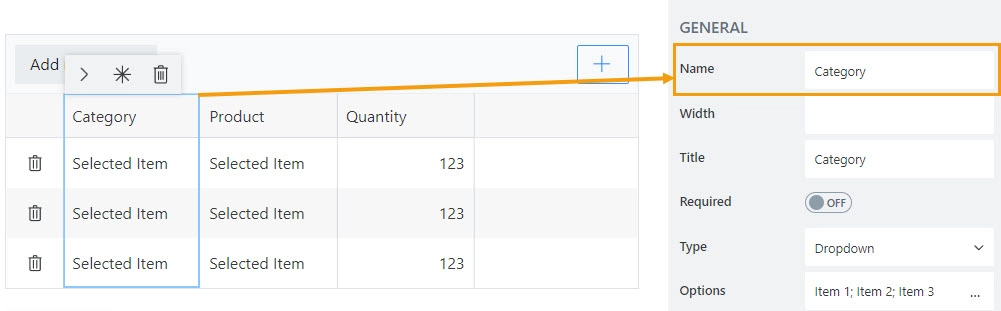
Then, add DataTable control, customize its Form, add Category and Product columns to DataTable, set them to Type: Dropdown and don’t forget to change their Internal Name to match title:
Populating Dropdown
To populate the Category dropdown column of DataTable control with data from Categories list, we use PnPjs library that is built into Plumsail Forms. Here is the code:
fd.spRendered(() => {
    fd.control('DataTable1').$on('edit', e => {
        if (e.column.field === 'Category') {
            // pass widget + current Category value
            populateCategories(e.widget, e.model.Category);
        }
    });
});

function populateCategories(widget, value) {
    // will show as loading
    widget._showBusy();

    sp.web.lists.getByTitle('Categories').items
        .select('ID', 'Title')
        .get()
        .then(items => {
            // set options
            widget.setDataSource({
                data: items.map(i => i.Title)
            });

            // set value if one was select
            widget.value(value);
            // hide loading state
            widget._hideBusy();
        });
}
Cascading Dropdowns
To display only products that belongs to the selected category, apply filtering to the data from Products list:
fd.spRendered(() => {
    fd.control('DataTable1').$on('edit', e => {
        if (e.column.field === 'Category') {
            // pass widget + current Category value
            populateCategories(e.widget, e.model.Category);
        }

        if (e.column.field === 'Product') {
            // pass widget + current Category and Product value
            populateProducts(e.widget, e.model.Category, e.model.Product);
        }
    });
});

function populateCategories(widget, value) {
    // will show as loading
    widget._showBusy();

    sp.web.lists.getByTitle('Categories').items
        .select('ID', 'Title')
        .get()
        .then(items => {
            // set options
            widget.setDataSource({
                data: items.map(i => i.Title)
            });

            // set value if one was select
            widget.value(value);
            // hide loading state
            widget._hideBusy();
        });
}

function populateProducts(widget, parentValue, value) {
    // will show as loading
    widget._showBusy();

    sp.web.lists.getByTitle('Products').items
        .select('ID', 'Title', 'Category/Title')
        .expand('Category')
        .filter(`Category/Title eq '${parentValue}'`)
        .get()
        .then(items => {
            // set options
            widget.setDataSource({
                data: items.map(i => i.Title)
            });

            // set value if one was select
            widget.value(value);
            // hide loading state
            widget._hideBusy();
        });
}
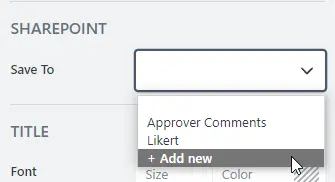
The value for the DataTable can then be stored either in hidden SharePoint field or in Multiline Plain Text column:
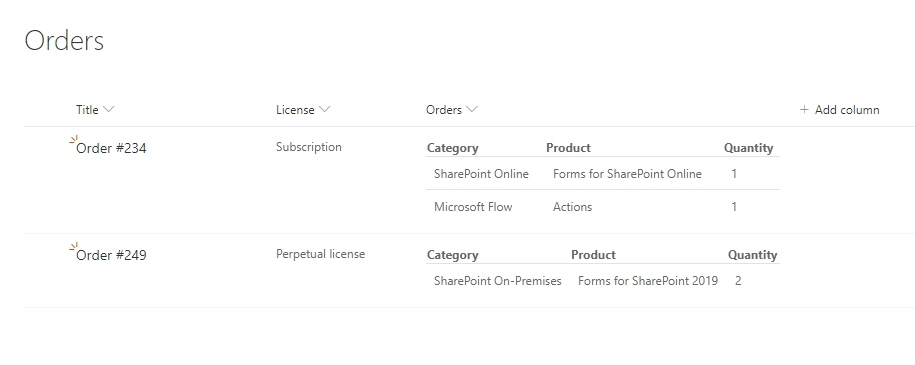
If you store data in column, you will see it displayed in List view with the help of our automatic customizers:
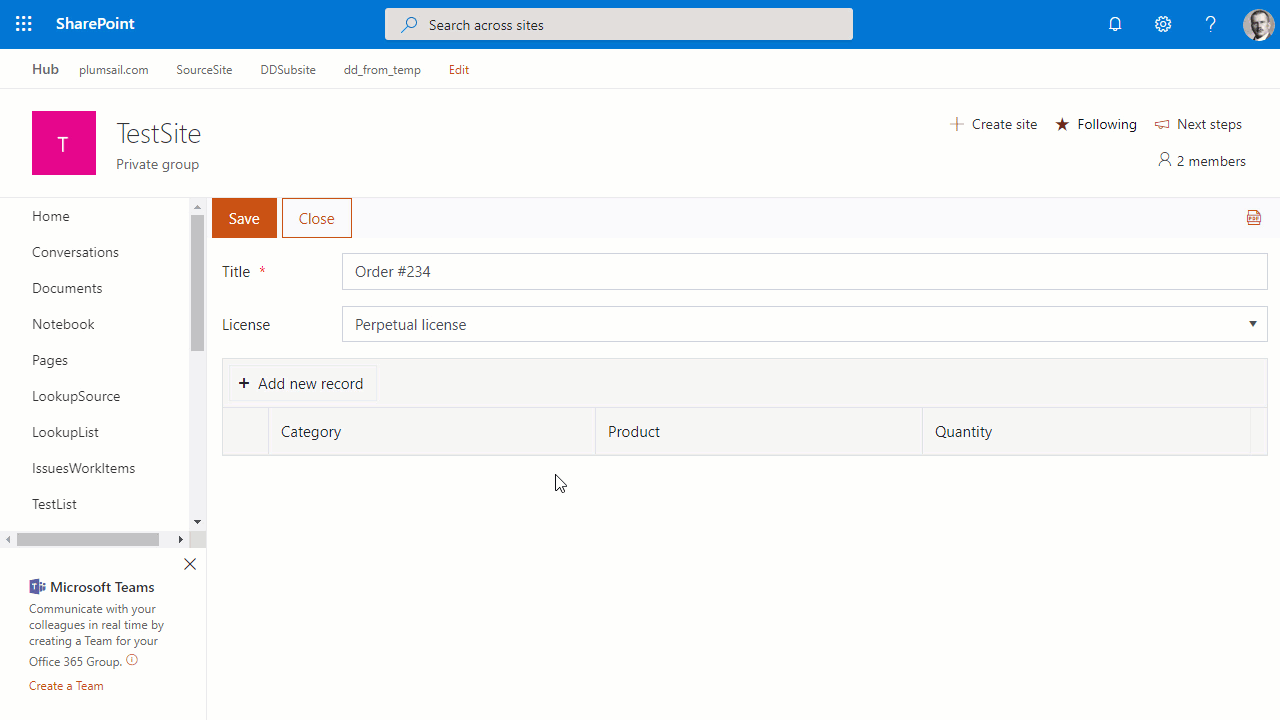
Here’s how our form would look like in the browser: