How to add Plumsail Forms app to Microsoft Teams chat or channel tab
Add Plumsail Forms app to a tab in a channel or chat to display custom forms or list data directly in Microsoft Teams.
Follow the steps below to add and set up Plumsail Forms app in a tab.
See Use an app in a tab, in a channel, or chat in Microsoft Teams for detailed instructions on adding tabs in Microsoft Teams.
Public web form
To add a public web form to a Teams chat or channel tab, do the following:
Design a public web form and save it.
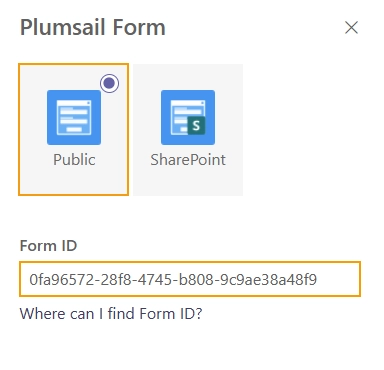
Once the form is saved, the form ID will appear in the URL of the designer. Copy it to the clipboard:

Add a tab with Plumsail Forms app to a channel or group chat.
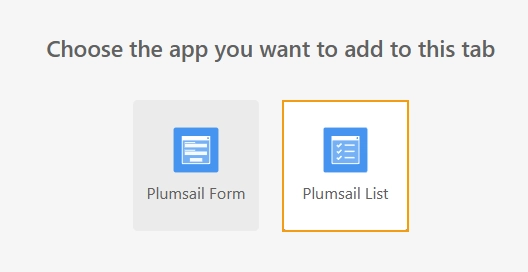
Once the tab is added, select Plumsail Form:

Select the Public type, and paste the form ID:
SharePoint form
To add a SharePoint form to a Teams chat or channel tab, do the following:
Add a tab with Plumsail Forms app to a channel or group chat.
Once the tab is added, select Plumsail Form:
Select the SharePoint type:
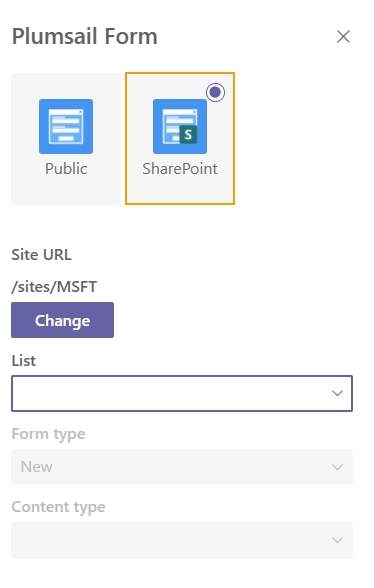
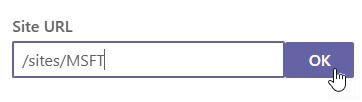
Enter the SharePoint site URL where a form is located:
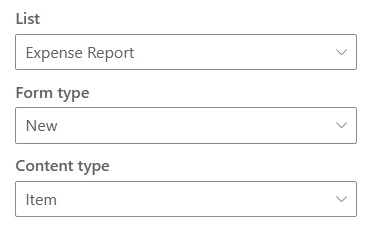
Select a list name, form type, and content type from the dropdowns:
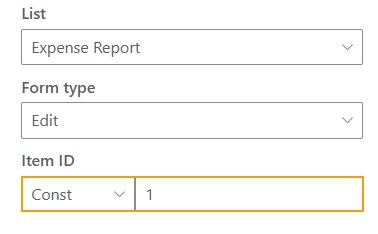
For Edit and Display forms, specify the item ID:
SharePoint list
Plumsail Forms app allows you to add a SharePoint list or library view to a Microsoft Teams chat or channel tabs. The app is based on the List or Library control and supports advanced column formatters.
To add a SharePoint list to a Teams chat or channel tab, do the following:
Add a tab with Plumsail Forms app to a channel or group chat.
Once the tab is added, select Plumsail List:
Enter the SharePoint site URL where a list is located:
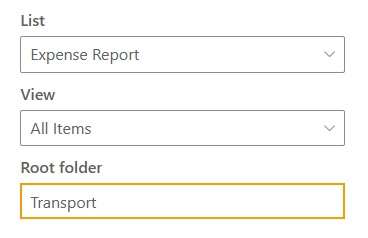
Select a list name and view from the dropdowns:
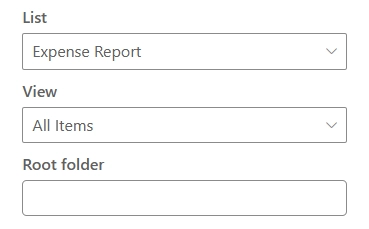
Specify a root folder name to limit the view to a specific folder. Users will not be able to navigate outside this folder:
Configure the following in Settings
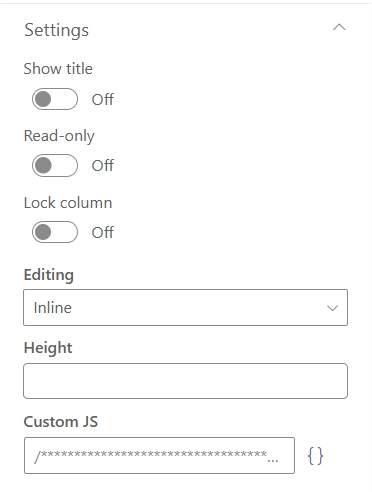
Show title — show or hide the title of the web part.
Read-only — sets the list view to read-only mode. When enabled, users will not be able to edit or create items in the list.
Lock column — locks the first column when scrolling horizontally.
Editing — select the editing mode:
Inline — allows editing directly within the list view.
Dialog — opens a dialog to create new and modify existing items.
Height — the web part dynamically adjusts its height to fit the content. Set the height in pixels to limit its vertical size. A vertical scrollbar will appear if the content exceeds the defined height.
Custom JS — customize the behavior of the web part and add custom column formatters. The code is executed when the web part is loaded.