Plumsail web parts for SharePoint pages
Important
You need to update the app package to be at least 1.1.0.4 or higher.
Use Plumsail Forms web parts to display custom forms and list data directly on SharePoint pages.
Follow the steps below to add and set up Plumsail web parts.
See Using web parts on SharePoint pages for detailed instructions on adding web parts to SharePoint pages.
Public web form
To publish a public web form to a SharePoint page, do the following:
Design a public web form and save it.
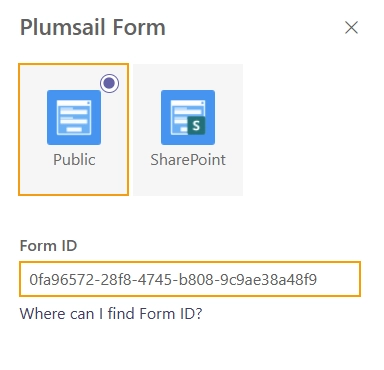
Once the form is saved, the form ID will appear in the URL of the designer. Copy it to the clipboard:

Add Plumsail Form web part to a SharePoint page:
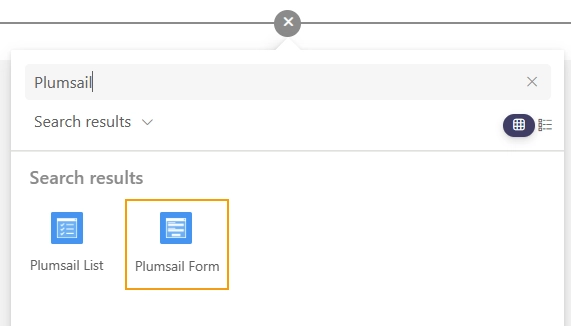
Click Configure to open the web part settings, select the Public type, and paste the form ID:
SharePoint form
To publish a SharePoint form to a SharePoint page, do the following:
Add Plumsail Form web part to a SharePoint page:
Click Configure to open the web part settings, select the SharePoint type:
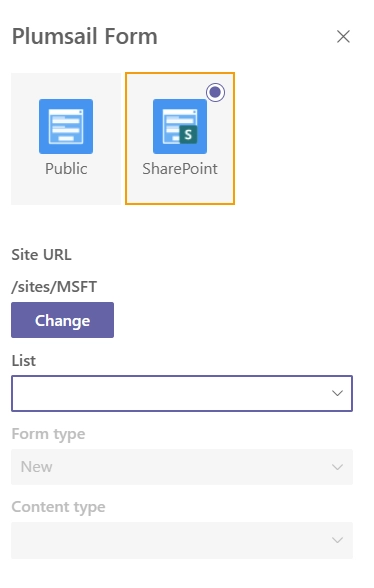
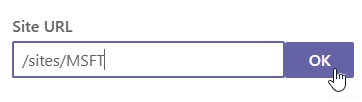
A form can be located on another site or site collection. Enter the SharePoint site URL where a form is located:
Select a list name, form type, and content type from the dropdowns:

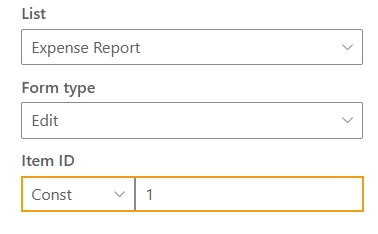
For Edit and Display forms, specify the item ID.
It can be a static ID:
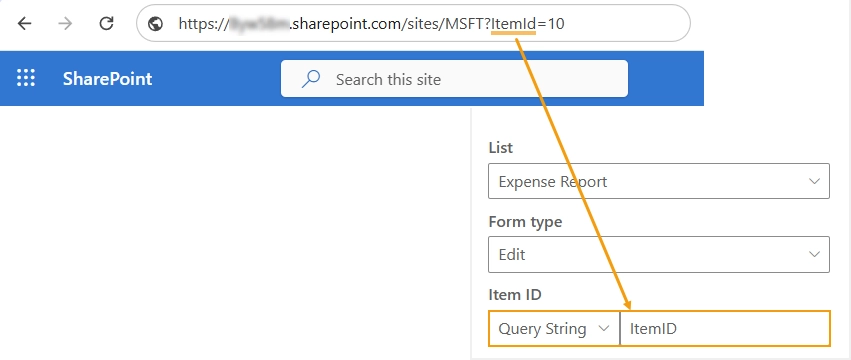
Or the item ID can be taken from the page’s URL, which you can modify before sharing a link with users:
SharePoint list
Plumsail List web part allows you to add a SharePoint list or library view to a SharePoint page. The web part is based on the List or Library control and supports advanced column formatters.
To add Plumsail List web part to a page, do the following:
Add Plumsail List web part to a SharePoint page:

Click Configure to open the web part settings.
A list can be located on another site or site collection. Enter the SharePoint site URL where a list is located:
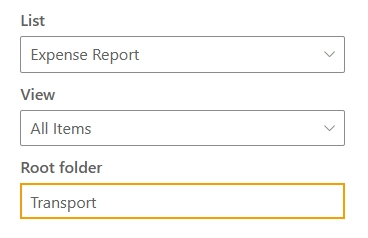
Select a list name and view from the dropdowns:
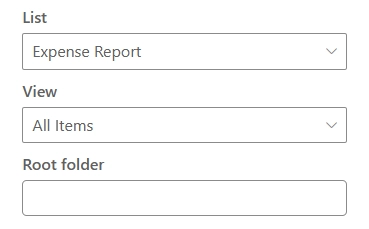
Specify a root folder name to limit the view to a specific folder. Users will not be able to navigate outside this folder:
Configure the following in Settings:
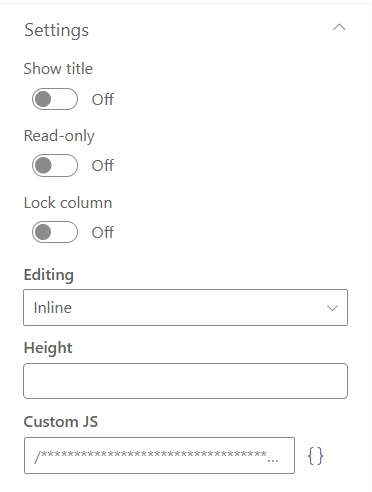
Show title — show or hide the title of the web part.
Read-only — sets the list view to read-only mode. When enabled, users will not be able to edit or create items in the list.
Lock column — locks the first column when scrolling horizontally.
Editing — select the editing mode:
Inline — allows editing directly within the list view.
Dialog — opens a dialog to create new and modify existing items.
Height — the web part dynamically adjusts its height to fit the content. Set the height in pixels to limit its vertical size. A vertical scrollbar will appear if the content exceeds the defined height.
Custom JS — customize the behavior of the web part and add custom column formatters. The code is executed when the web part is loaded.