Quick HelpDesk configuration
Once HelpDesk has been installed, you can start working with it straight away, no further configuration required. There are a couple of things you may want to set up to make your life easier, however. You can:
Specify incoming email settings
If you want to receive new tickets from your support email address you need to configure message forwarding. Navigate to HelpDesk settings using the icon in the navbar:

You will see the “Email settings” section.

Fill in incoming email settings
Specify outgoing email settings
To send notifications HelpDesk needs SMTP server settings. Fill in SMTP server settings:
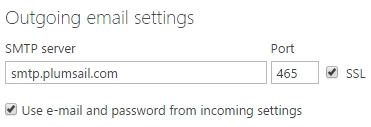
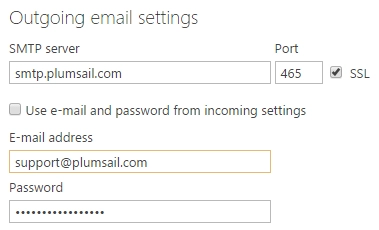
By default HelpDesk uses the same address and password as you specified in incoming settings. But you can uncheck this option and specify them manually:
Start synchronization of email messages
You can notice small widget “Sync service status” at the first picture. It is responsible for conversion of incoming email messages into tickets. Click “Start” to enable synchronization:
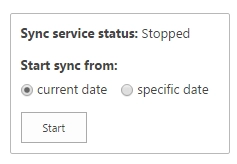
You can choose “Sync from current date” or “Sync from specific date”. Second option is especially useful if you have a lot of messages in your inbox and want to start synchronization from current date without conversion of old messages to tickets.
Once you started sync service, it will run synchronization periodically (5 minutes interval). If you want to sync messages right now, click “Sync now”:
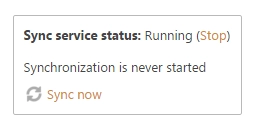
You can interrupt synchronization any time by stopping the service.
Create agents
HelpDesk has a place for storing contact details of your customers or agents. There are three types of contacts:
Agent — SharePoint user that processes tickets.
Member — SharePoint user that creates tickets.
End-User — User without a SharePoint account that creates tickets by email.
End-Users and Members are created automatically, when a new ticket is created or when a user visits help desk for the first time. The only case when you need to do something manually is when you create a new agent or convert an existing contact to an agent by changing his role. Once you created an agent, you can start receiving notifications about new unassigned tickets.
To create a new contact, navigate to “Contacts” using the icon in the right navbar:

Then specify mandatory fields and submit the form.