Collect data from fillable PDF and save it into your system in Power Automate
Note
One of our customers voluntarily recorded an overview of a business case for collecting data from PDF forms and for automatic filling them. You can watch the video in addition to reading the article.
In this article, you will learn how to collect data from fillable PDF form in Power Automate (Microsoft Flow) or Azure Logic Apps. We will use Get Form from PDF action from Plumsail Documents connector.
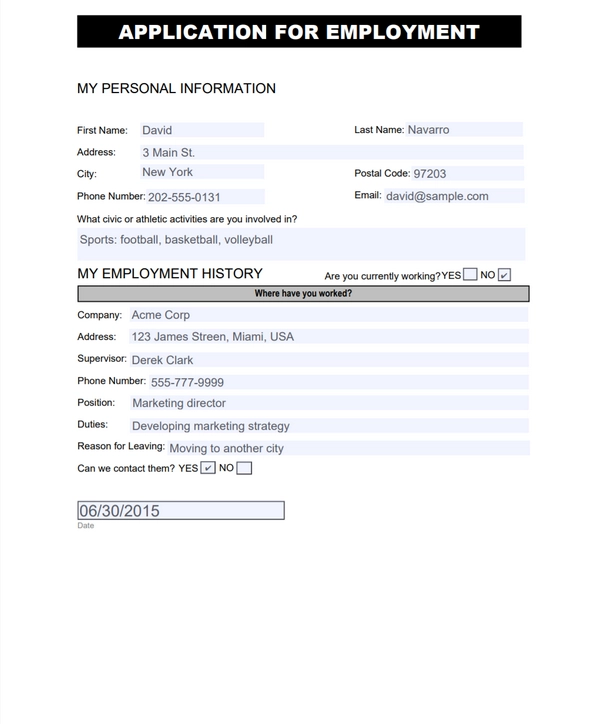
In our case, we will collect data from Application for Employment form, we will get this PDF file via email using When a new email arrives trigger from Office 365 Outlook connector. However, you can get the file from any other source.
For example, you can use triggers from OneDrive or Dropbox connectors.
This is how our PDF file looks like:
In this example, we will store the information we get from the PDF file in the SharePoint list. You can save it as a new text document or transfer it to some other system. Power Automate (Microsoft Flow) has a lot of connectors for different systems. Here are just a few of them:
SharePoint
Box
OneDrive
Google Drive
Dropbox
SFTP
File System
This is what our Flow looks like:
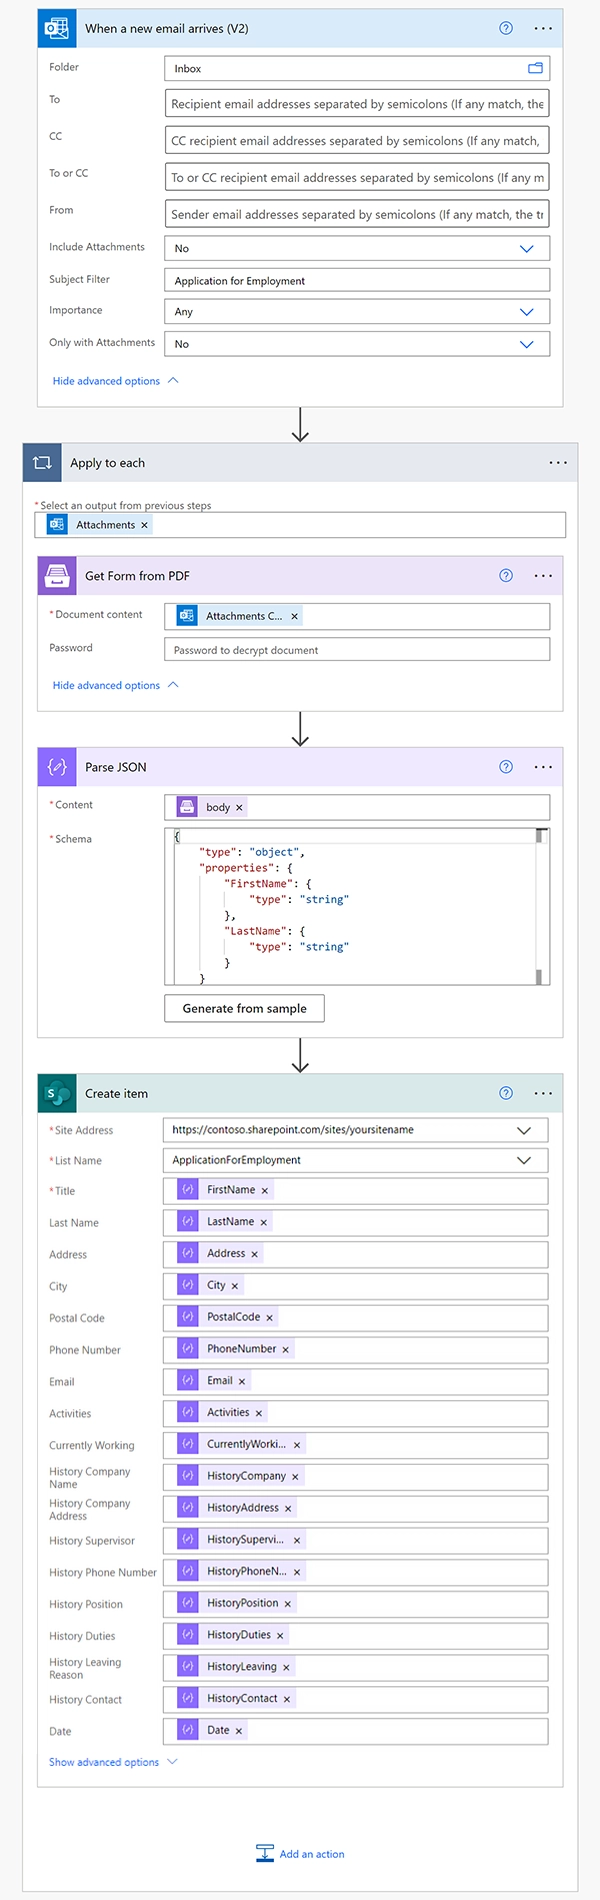
Let’s take a closer look at each step of the Flow.
Flow trigger
We are using When a new email arrives trigger from Office 365 Outlook connector to get a newest received email which contains ‘Application for Employment’ in its subject.
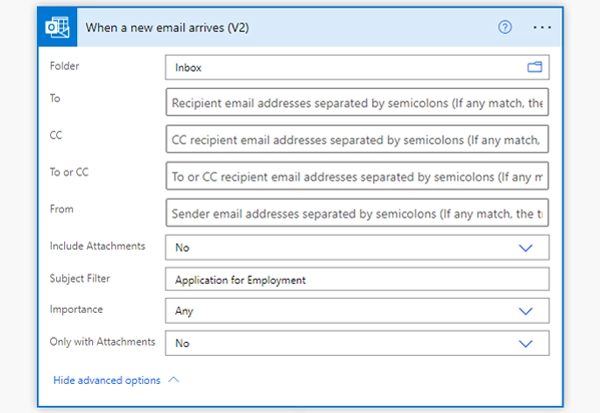
Please notice, that we also switched properties ‘Has Attachment’ and ‘Include Attachments’ to ‘Yes’, we need this so we could get email’s attachment in Get Form from PDF action later on.
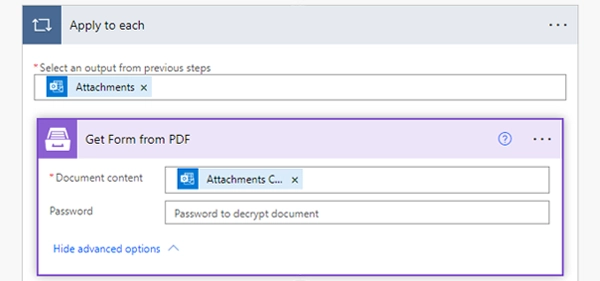
Get Form from PDF action
Get Form from PDF is the action from Plumsail Documents connector. You can use it to get data from PDF forms.
If this is your first time using the Plumsail Documents connector, Power Automate will request the Connection Name and API Key.
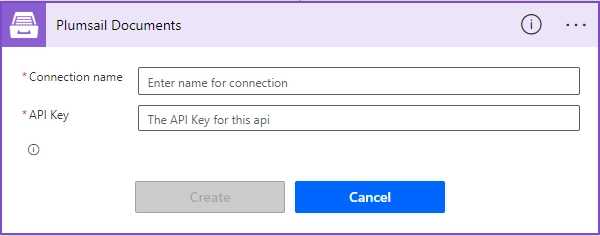
You can type any name for the connection, for example Plumsail Documents.
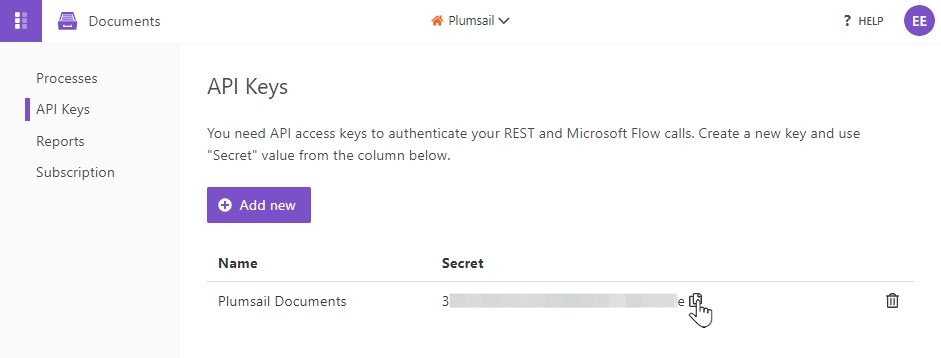
Once the connection name is filled out, create an API key in your Plumsail Account, copy and paste it into the Access Key field, and then click Create.
In the parameter ‘Content of the PDF document’ we specified the attachment’s content from the email that we received in our trigger. You can notice that this action was automatically inserted into the loop. There could be multiple PDF documents that we need to proceed.
In the parameter ‘Password’ you can specify a password to decrypt the source document. If it was encrypted earlier.
Parse JSON action
We are using this action to parse JSON response from the previous step.
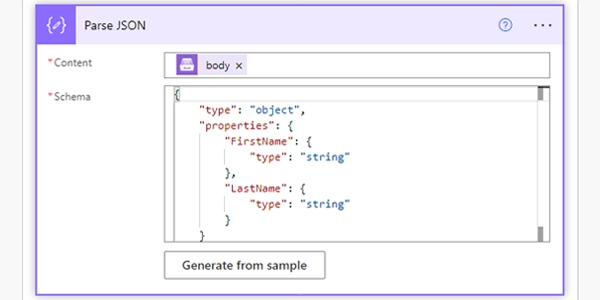
To parse JSON you need to build a schema for it so you could use the output from this action later in the flow. To generate a schema you should click on ‘Use sample payload to generate schema’ at the bottom of the action. There you can insert a sample of the JSON object that you might receive:
{
  "FirstName": "David",
  "LastName": "Navarro"
}
After that, there will be generated a schema according to this JSON. The schema will include 2 string fields with the corresponding names:
{
  "type": "object",
  "properties": {
    "FirstName": {
      "type": "string"
    },
    "LastName": {
      "type": "string"
    }
  }
}
In our case you should insert this JSON to generate a schema for it:
{
  "City": "New York",
  "PhoneNumber": "202-555-0131",
  "PostalCode": "97203",
  "Address": "3 Main St.",
  "Activities": "Sports: football, basketball, volleyball",
  "FirstName": "David",
  "HistorySupervisor": "Derek Clark",
  "HistoryPhoneNumber": "555-777-9999",
  "HistoryPosition": "Marketing director",
  "HistoryDuties": "Developing marketing strategy",
  "HistoryLeaving": "Moving to another city",
  "HistoryAddress": "123 James Streen, Miami, USA",
  "HistoryCompany": "Acme Corp",
  "LastName": "Navarro",
  "Email": "david@sample.com",
  "Date": "06/30/2015",
  "CurrentlyWorking": "No",
  "HistoryContact": "Yes"
}
Create item action
Now we need to store the data we received from PDF somewhere. In our example, it will be a SharePoint list. It contains the same columns as input fields in the PDF file.
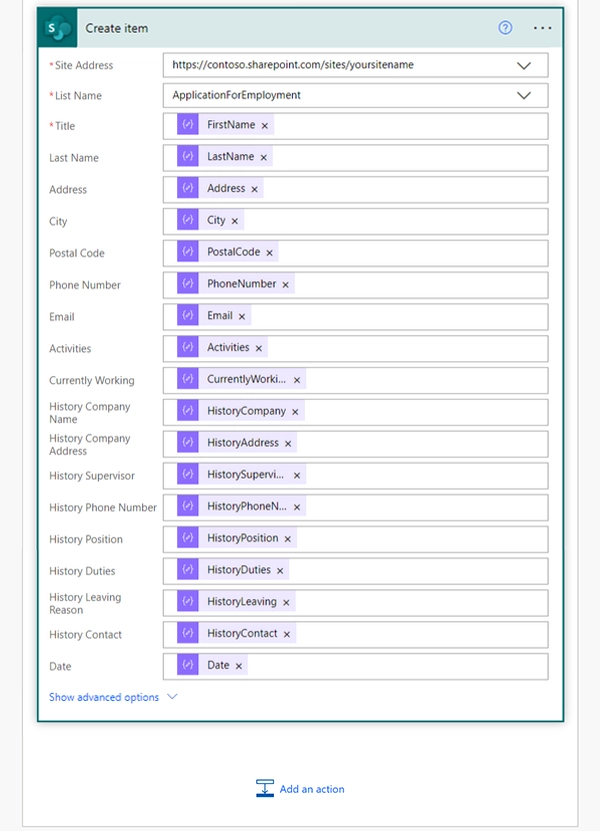
You probably noticed all these parameters in the action that we are using, they are from the previous step, for which we built the JSON schema.
Conclusion
Now you should have an idea how to use Get Form from PDF action from Plumsail Documents connector for Power Automate (Microsoft Flow). If you haven’t used it yet, registering an account would be the first step. It is quite easy to get started.