Copy or move SharePoint list items with attachments cross-site in Power Automate
In this article, we will demonstrate how to archive SharePoint list items with help of Power Automate (Microsoft Flow). This approach works in SharePoint Online (Office 365).
Let us imagine the following use case: We have a list of tasks with attachments. There is another list in another site collection to archive tasks. We want to move all tasks older than 30 days to this archive list.
I will show how to use Move List Item to SharePoint List action, but it works the same way for Copy List Item to SharePoint List action. These actions are from Plumsail SP connector, which is a part of Plumsail Actions.
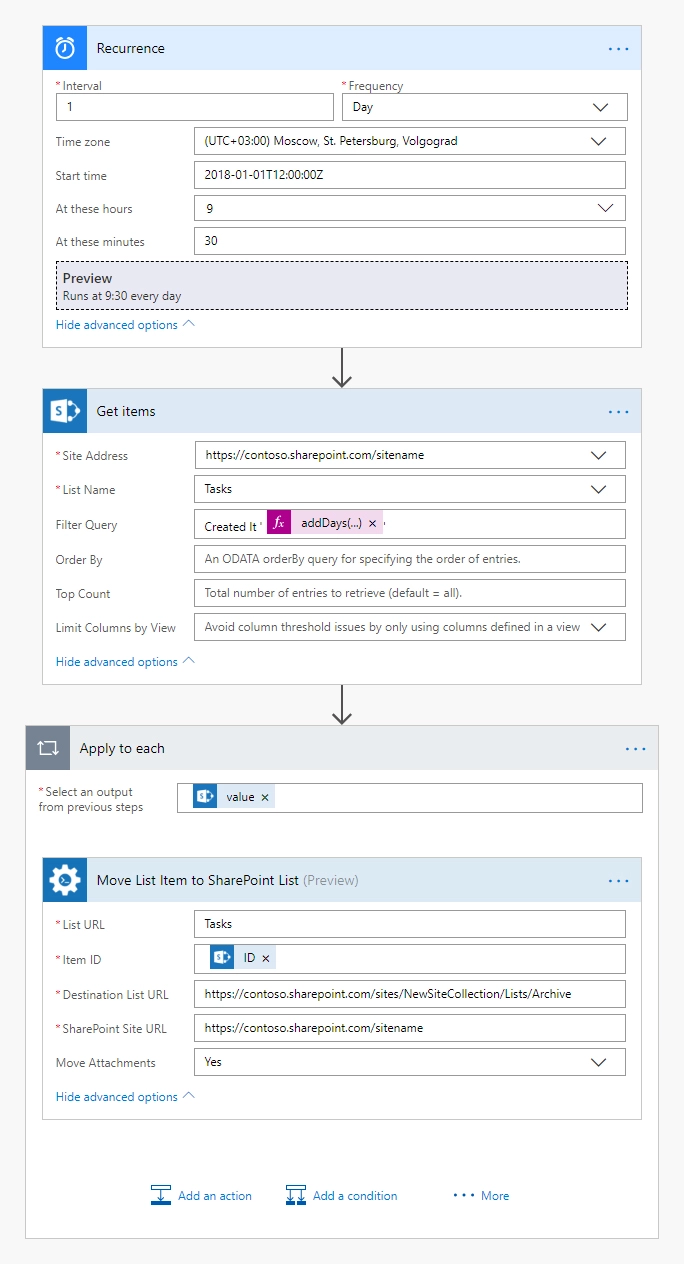
This is how our complete flow will look like:
Configure Power Automate (Microsoft Flow):
Below, we will guide you step by step through creating the flow.
Schedule flow to start every day
We schedule our flow to start every day at 9:30 AM Moscow time. You can choose any recurrence.
Query all tasks older than 30 days
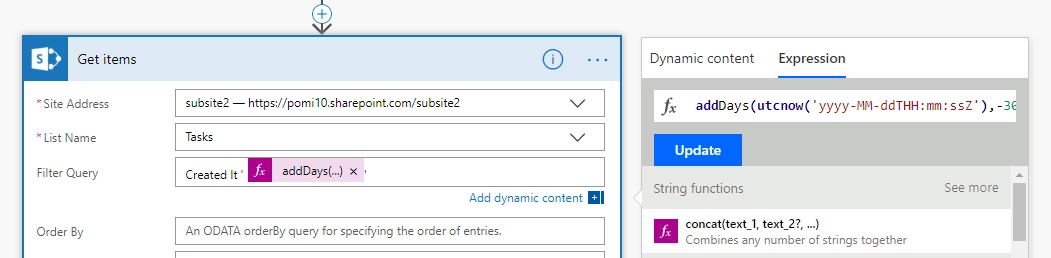
On this step, we specify the site, the list name, get items and filter them on the creation date.
In this scenario, we want to filter out new items and only get items that have the created date that is more than 30 days old. To accomplish this we use a flow expression that will calculate the date, 30 days ago. We will then look for any item that has a Created date that is less than this date.
The complete expression is: Created lt ‘addDays(utcnow(‘yyyy-MM-ddTHH:mm:ssZ’),-30)’. In this scenario, Created is our source field, lt represents our ‘less than’ operator and addDays(utcnow(‘yyyy-MM-ddTHH:mm:ssZ’),-30) will calculate a date of 30 days prior.
As the output, we only have items that are more than 30 days old.
Move the queried items in a loop
We proceed to the last step and simply add to the flow Move List Item to SharePoint List action actions from Plumsail SP connector.
Adding the Plumsail action for the first time, you’ll be asked for a Connection name and Access Key.
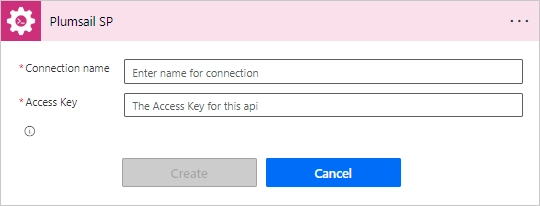
You can type any name for the connection. For example, “Plumsail Actions”. Next create an API key on your Plumsail account page, copy, and paste it to the “Access Key” field.
Then we click Item ID field and add there item ID from a menu on the right. This will automatically transform this action into repeating one which will be performed for each file from the source folder.
We specify the Destination list name, list URL as well as SharePoint Site URL to define the context of the action.
In the end, we also click Show advanced options and pick Yes to move the items with the attachments.